
From Chaos to Control - Part II: Task Management
Using Logseq to Track and Manage Tasks Effectively

In Part I, we explored how Logseq can be a game-changer for organizing our note-taking life. One key takeaway was the importance of using keywords as pages/tags, which allows for the natural growth of your notes into a cohesive mesh.
In this section of the mini-series, we'll dive into managing tasks and installing plugins from the Logseq plugin screen to make task management easier and help plan your work more efficiently.
Before adding our first task, we need to check a few settings. Let's open the settings screen by clicking the three dots in the top-right corner and selecting “Settings.” This screen lets us customize the look and feel of Logseq and make changes to the “Editor,” which is where we'll focus for this session.

The main settings we want to look at on the Editor screen are “Preferred workflow,” which starts with “TODO/DOING,” and the “Timetracking” toggle. These two settings will impact what you see in Logseq as we move through the rest of the tutorial.
Personally, I keep it on “TODO/DOING” because I don’t use the middle step when working on tasks in Logseq (we will explore the task flow and some plugins that can modify the built-in flow). I leave “Timetracking” off, as I don’t use it. However, if you’d like to track the time spent on specific tasks and use the built-in Logseq workflow, then toggle on “Timetracking.”
1. Creating our 1st Task
Now let’s create our first task and understand the built-in workflow and how time tracking works within Logseq. To do this, close the “settings” screen and go to your “Journal” page. Type “Learn tasks in Logseq!” then hold CTRL and click ENTER. Voila… we have just created our first task in Logseq. Depending on your “Preferred workflow” setting, you may see LATER instead of TODO as the task word. Press ESC, and now we see a checkbox.

And just like that, you have the knowledge to create dynamic notes and tasks. To delve into “How to Manage Tasks,” we first need to discuss the “Advanced” features of Logseq, like the “forward-slash (/)” commands and block “properties.”
2. Adding a Priority and Task Deadline
Keeping with the theme of tasks and the one we just created, go to the end of the line and type the forward-slash (/). Take a look at the options that appear. These options offer various functionalities, but we’re going to focus on the “Priorities” section, which includes A, B, and C, as well as the “deadline” and “scheduled” options for tasks.
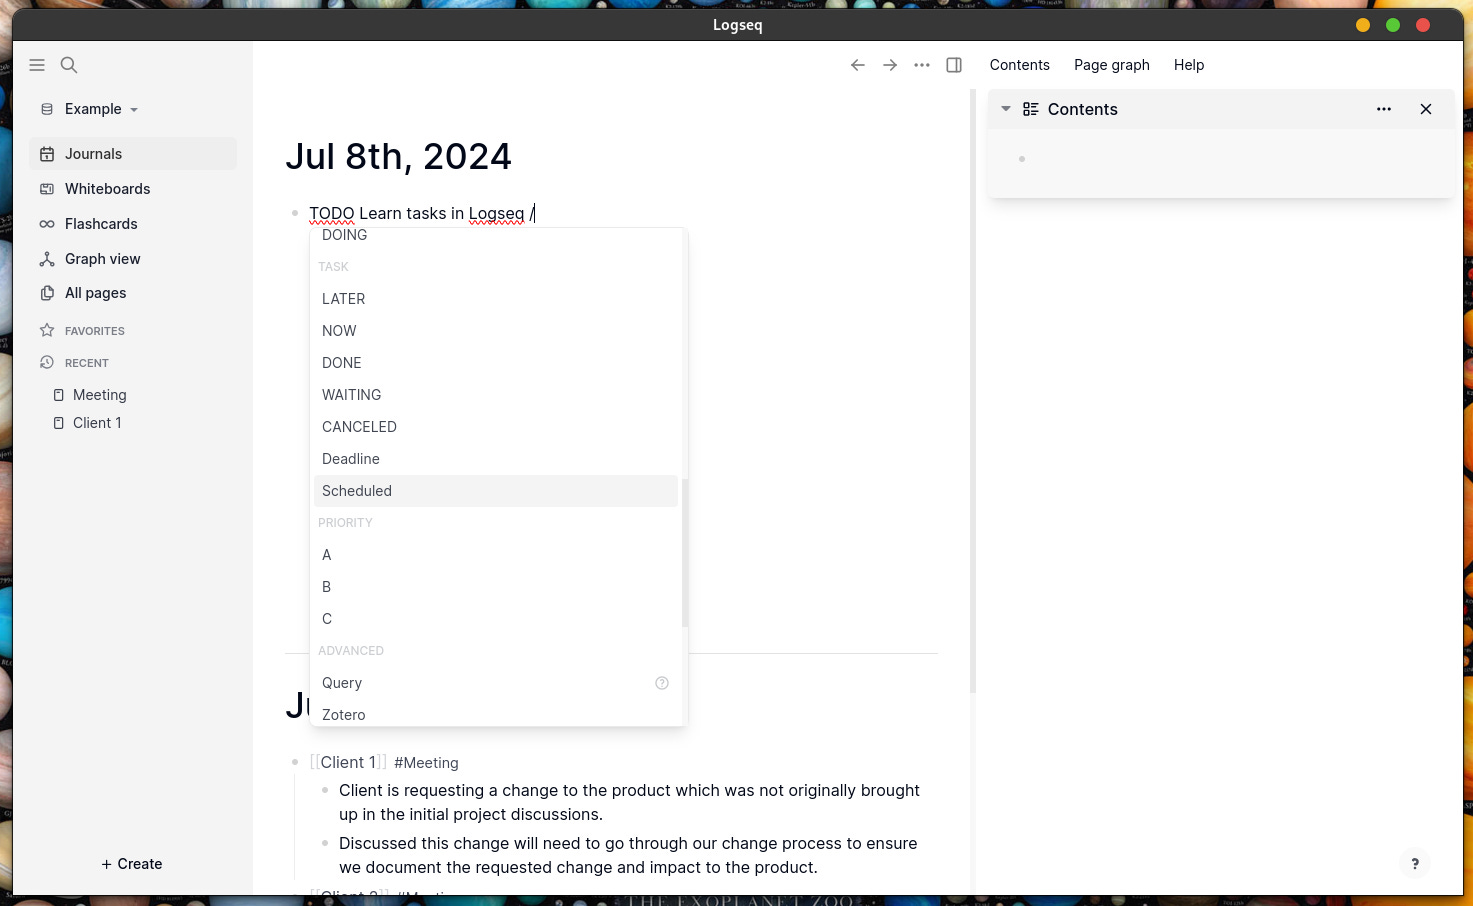
Priorities in Logseq use characters A-C, where A = High and C = Low. As for “deadline” and “scheduled” they function similarly when you dive into complex queries in Logseq. Personally, if it’s a non-important task with no set due date, I use “scheduled.” For important tasks with hard deadlines, I use “deadline.” Combining the priority and task due date properties helps me determine which tasks need my immediate attention.
By using the “Journal” page to create tasks, we automatically have a creation date. With priority settings, we can decide how to tackle each task. Using “scheduled” and “deadline,” we can further categorize tasks to know which to handle first, which to schedule, which to delegate, and which to delete.
Let’s complete our current task by holding CTRL and pressing ENTER twice. Pat yourself on the back—we just completed our first Logseq task! But wait, you’ll notice there’s no completion date added or an easy way to track completed tasks. Also, there’s no straightforward method to see which tasks are still open unless they’re right in front of you in Logseq. Advanced features and plugins to the rescue!
3. Plugins
We’ll start with plugins, as Logseq offers a plethora of options through the “Plugins” menu. Some advanced features require Clojure queries, but let's begin with a simple yet effective plugin that fits perfectly with our mini-series—a plugin that captures the completion date when a task is marked as DONE.
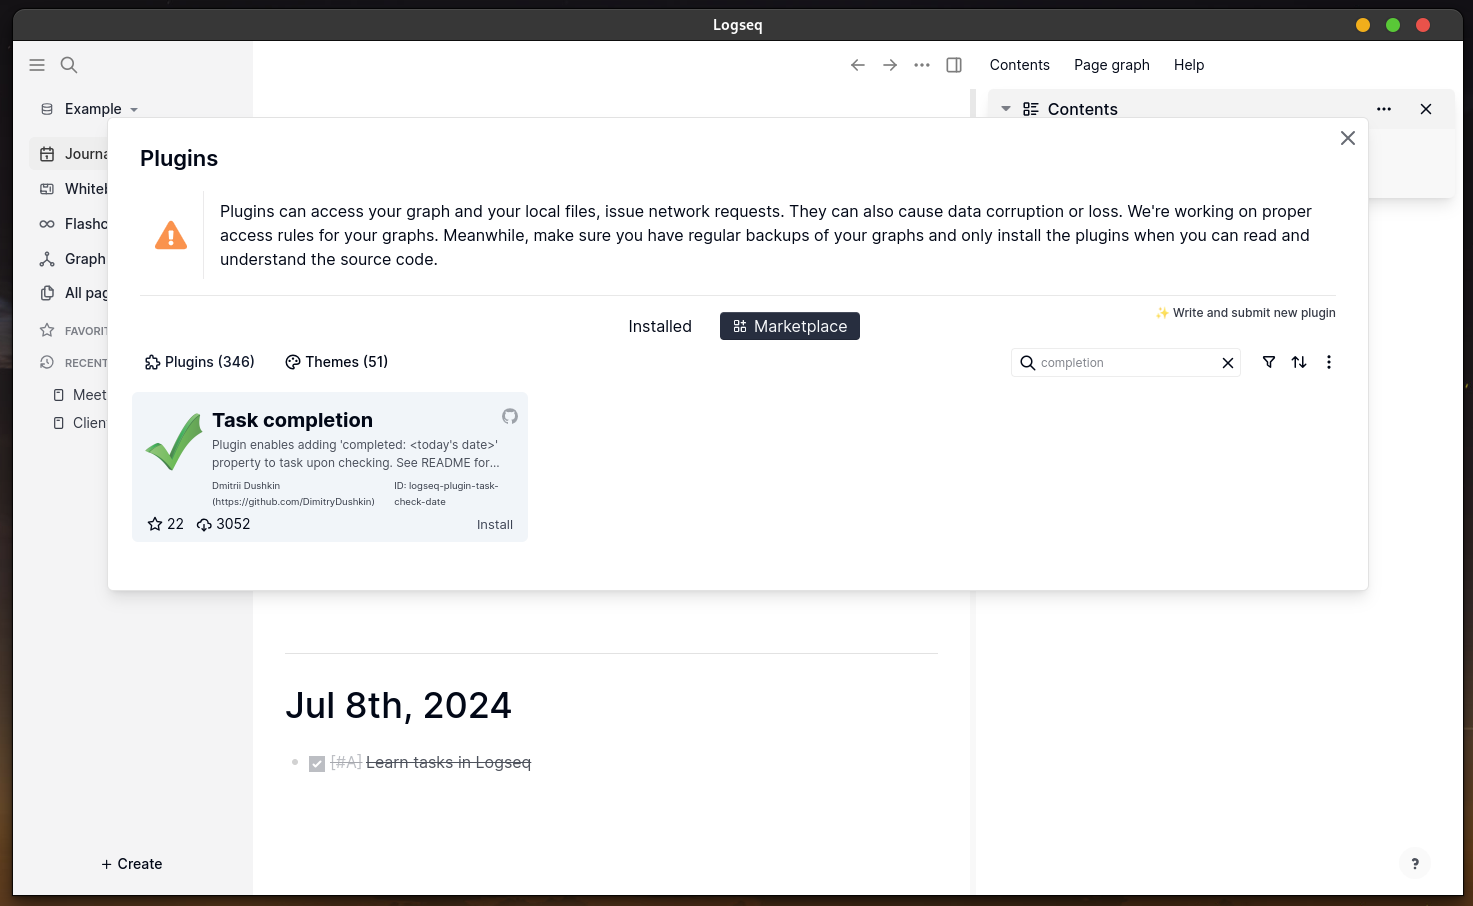
To get started, click the three dots in the top-right corner and select “Plugins.”


Initially, it might seem empty because it auto-selects your installed plugins. Select the “Marketplace” to see the full list available for easy installation. And wow, what a list—346 plugins and 51 themes at the time of writing!

In the “Search Plugins” bar on the right, type “completion.” The plugin we’re interested in is “Task completion.” Install it by clicking the “Install” button next to the plugin.
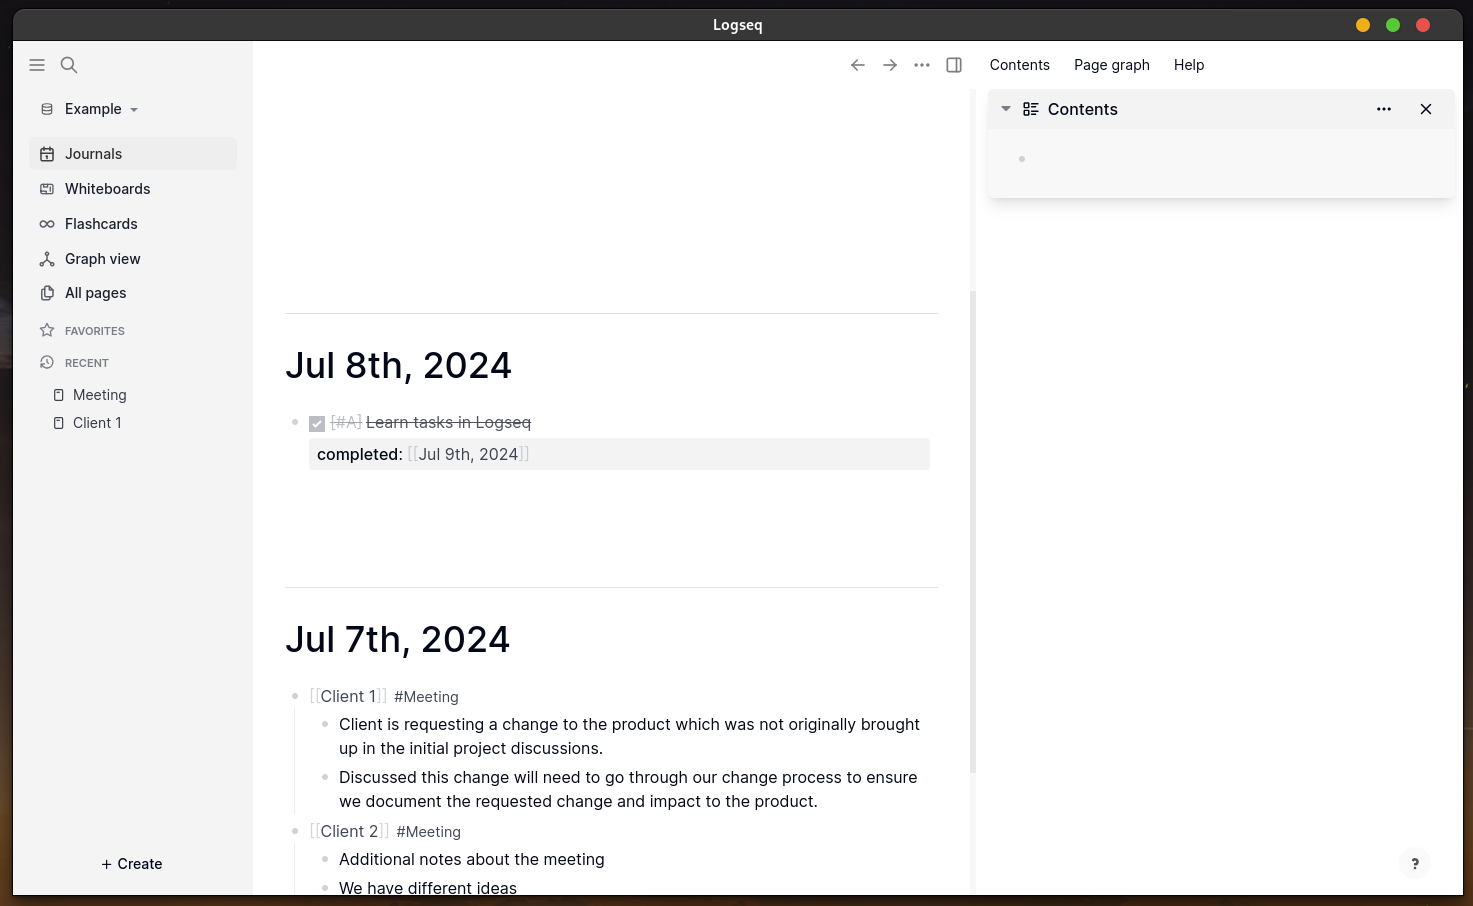
Once installed, close the plugins screen. Now, let’s move the completed task back to TODO and then re-complete it. Look at that—we now have a “Property” showing the date the task was completed. This feature allows us to determine the time between identifying and completing a task. This additional information can help us run advanced queries to understand and manage our tasks more effectively.
We’ve installed our first plugin—a simple one that adds the date when you move a task to the DONE state. Now that we know how to install plugins, let's enhance Logseq by improving its look and adding functionality to aid with tracking notes and identifying new topics. Here’s the list:


Now let’s get to customizing Logseq and changing options to get it working how we need it for our next few examples of more advanced workflows.
We’ll start with the UI plugins, all beginning with “Awesome.” These plugins make Logseq look amazing and allow for individual customization easily, without needing to add custom CSS code. To access the plugins, click on the puzzle piece in the top right corner. The drop-down will show which plugins you can pin to the top bar for easy access.

First, we’ll start with “Awesome Styler” and pin it to the top bar. Then, press t t to switch to a dark theme. Next, click the paint palette icon you just pinned and select “logseq-awesome-styler” to activate it. Your Logseq should now have a completely new look, and when you click on the paint palette, you’ll see a list of themes to choose from.

I personally like the “Bear” theme because of its bold color differences. To see the rest of the plugins you installed, click back on the puzzle piece and then “Settings.”

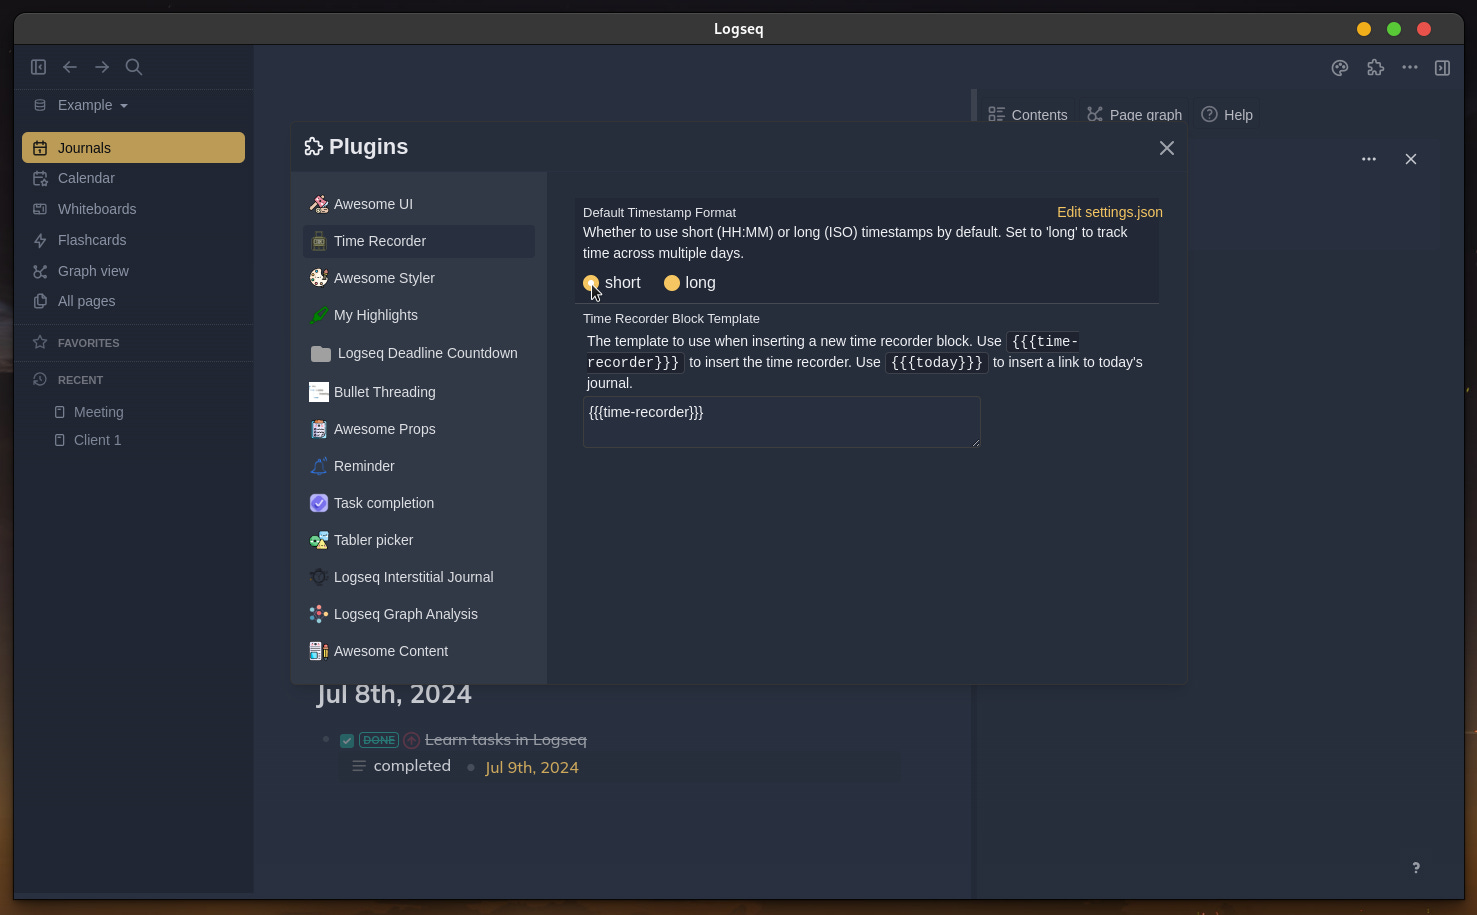
After applying a new theme, we will explore “Time Recorder,” “My Highlights,” “Logseq Deadline Countdown,” “Task Completion,” and “Awesome Props” to set our workflow settings and give our properties (like the completion date) a fresh look. Let's start from the top with “Time Recorder,” which we will use instead of Logseq’s built-in time tracker. One advantage is that it allows us to modify the start and end times if needed. I find being able to adjust the start time particularly useful for meetings—they have a fixed start time, and if I only need to stop the timer, that’s one less click to worry about.
To make the most of “Time Recorder,” switch to the short time format, as I primarily use it for tracking time on a day-to-day basis, not over multiple days.
Next, let’s move to “Logseq Deadline Countdown.” Here, we shouldn’t need to change anything, but this plugin is excellent when you use the “scheduled” or “deadline” task property. It visually tells you how much time you have until the deadline you set for yourself. I keep it set to hours since I often set time-specific deadlines for tasks that need to be completed before meetings. This helps me stay on top of my tasks and manage my time effectively.

4. Task Management
We are now ready to add tasks to our Logseq page and start setting up an Eisenhower Matrix in the “Contents” page to manage our tasks. Let’s create at least three tasks with different priorities and deadlines to show a simple yet optimized way to view and manage them. Feel free to use the examples I’ve added in the screenshot below.
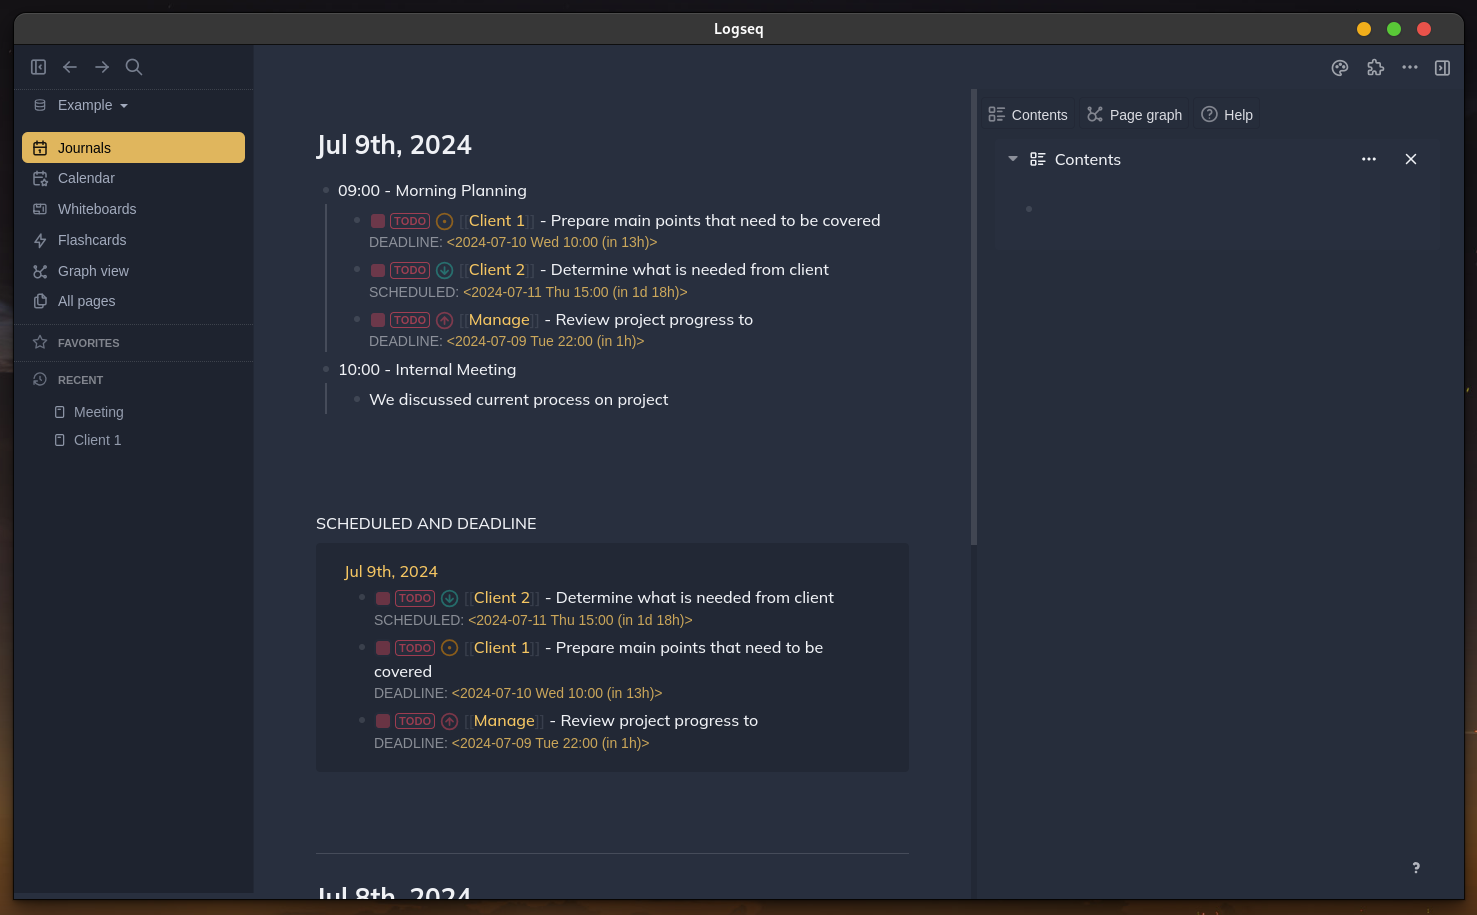
One thing we haven’t really touched on is the right “Contents” page in Logseq. This page can be used for many different things, but I find it particularly useful for creating queries that put tasks right in front of me and help categorize them. To start, let’s get our cursor in the “Contents” page and type {{query (todo todo)}} and hit enter. Look at that—all our TODO tasks now show up in the right column.

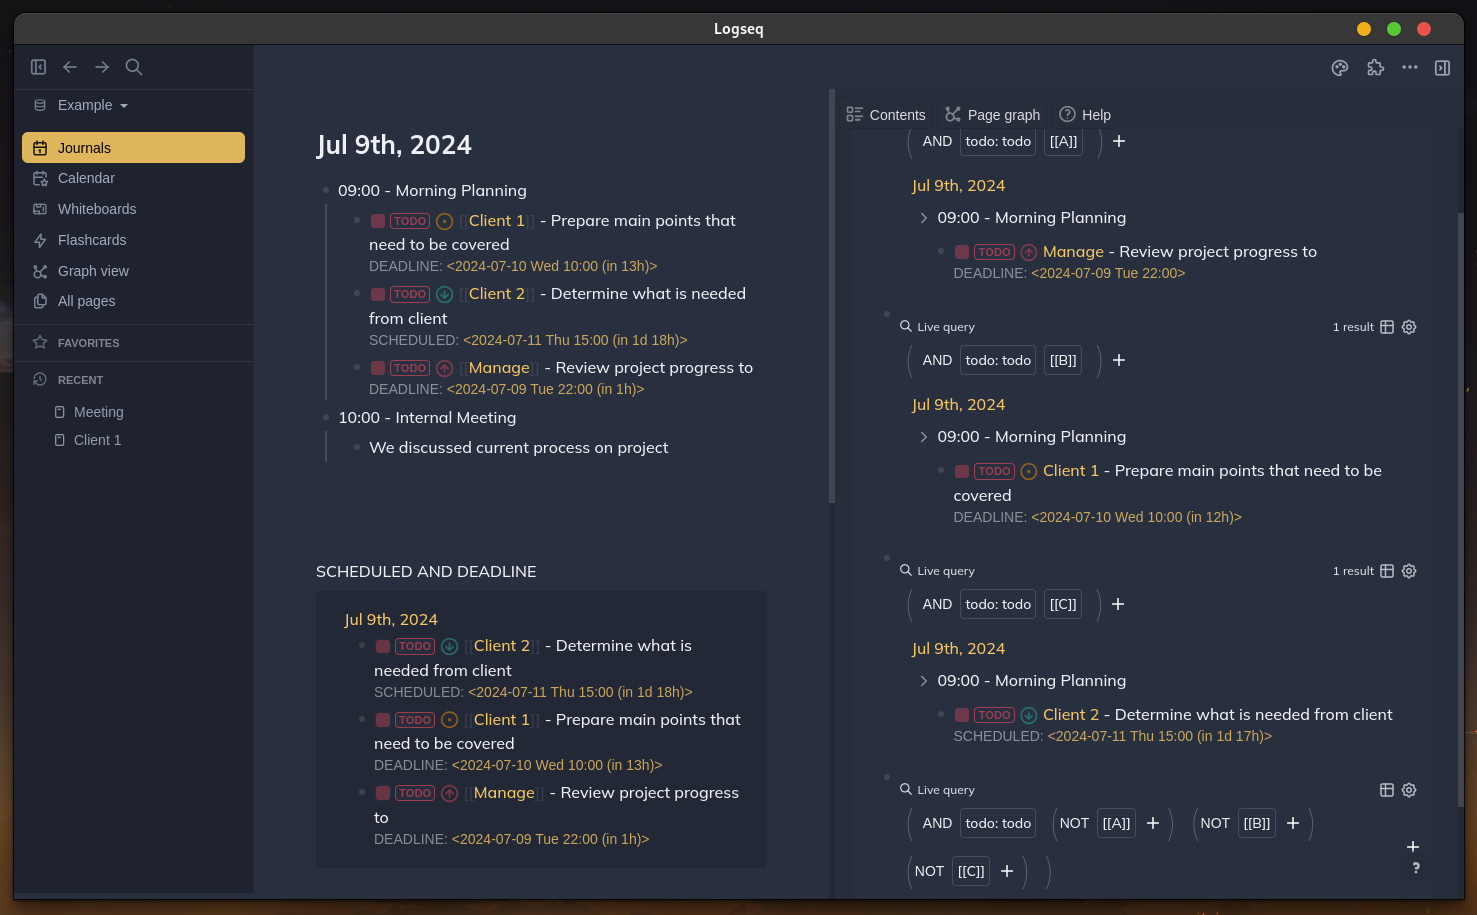
To build on this and create our Eisenhower Matrix, we will split the tasks by priority for a simple approach. Click the “+” button, choose “Page Reference,” and select “A.” We have now created our “Immediate” bucket.

Next, we’ll work on the three remaining categories. This time, we will create them by typing out the queries instead of using the “+” button. Copy and paste the following queries below the previous one you created:
{{query (and (todo todo) [[B]])}}
{{query (and (todo todo) [[C]])}}
{{query (and (todo todo) (not [[A]]) (not [[B]]) (not [[C]]))}}
If your “Contents” panel looks like the image below, give yourself a big kudos! You just took task management to a new level. You now have the tools to create growing, connective notes and manage your tasks effectively in Logseq.
In the next mini-series, we will start going over workflows and why using the “Journal” makes more sense. We’ll also explore how to use some of the other plugins we downloaded in this article.
If you’re enjoying the series so far, why not subscribe? Have any questions or find some of the directions hard to follow? Let me know, and as always, let’s grow together!
TLDR:
Part I covered using keywords as tags in Logseq. This section focuses on task management and plugins. We adjust settings, create tasks, and use advanced features. Installing plugins like "Task completion" enhances task tracking. We set up an Eisenhower Matrix to categorize tasks by priority. Next, we’ll explore workflows and additional plugins.
Summary:
In Part I of our mini-series, we explored how Logseq can revolutionize note-taking by using keywords as pages/tags for a cohesive note mesh. In this section, we dive into task management and installing plugins to streamline workflow.
We start by configuring settings, focusing on the "Preferred workflow" and "Timetracking" options in the Editor settings. Then, we create our first task in Logseq and discuss advanced features like the forward-slash commands and block properties. We learn to prioritize tasks using characters A-C and to set deadlines or schedules for effective task categorization.
Next, we install the "Task completion" plugin to capture task completion dates and enhance task tracking. We explore additional plugins to customize Logseq’s appearance and functionality, including themes, time recording, and deadline countdown.
Finally, we set up an Eisenhower Matrix in the "Contents" page using queries to categorize tasks by priority, creating a dynamic and efficient task management system.
In the upcoming series, we’ll delve into workflows and further plugin usage to optimize our Logseq experience.